If you have a card deck in your design (DSN file) that has cards of various sizes, and potentially in various locations (coordinate-wise), and you have a need to determine the overall bounding box for the entire card deck, you can use control code to accomplish that task.
The attached ZIP file ("bounding_box.zip") provides a complete example, which was created using Altia Design version 11.3. The ZIP file contains a DSN file ("bounding_box.dsn"). Inside that design is a group object called "Deck Bounding Box Calculator".
The example design also contains a card deck ("Some Deck") that contains 7 separate cards, each one containing a single image object referencing a specific image from the "images" sub-directory. The image files are all different sizes (widths and heights), and are positioned at different X/Y coordinate locations, on purpose.
To get an idea of how the "Deck Bounding Box Calculator" works, you can review the attached Control Code ("control_code.rtf"), even if you do not have Altia Design installed on your PC.
Training Mission
If you have Altia Design installed on your PC, and would like to try out this example design, just follow these steps.
1. Download the attached file ("bounding_box.zip"), and save it to a convenient location on your PC.
2. Unzip the file, and navigate into the sub-directory. You should see something like this:

3. Run Altia Design 11.3 (or later), and open the "bounding_box.dsn" file. The Edit window should show something like this:
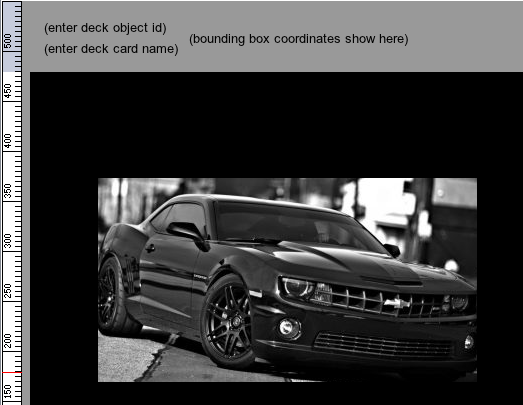
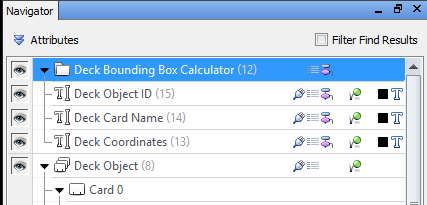
4. Note the text I/O objects at the top of the window. They are contained within the "Deck Bounding Box Calculator" group shown below.
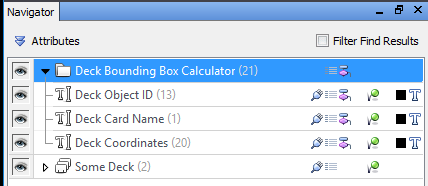
5. With that group selected, if you open the Properties pane, you will see its Custom Properties.
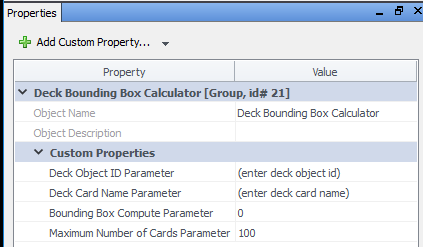
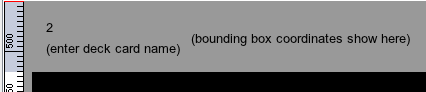
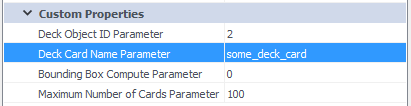
6. In order to compute the bounding box of a card deck, you will need to set the first 3 of these custom properties. You may set the first 2 in either order, but you must set the 3rd one lastly. (You can omit the 4th parameter in most cases. We will discuss that one later.) In this example, start by setting the "Deck Object ID Parameter". The value for that parameter depends on the card deck for which you desire to compute the bounding box. In this case, the value is 2 (the ID of "Some Deck"), as seen in the image at step #4.

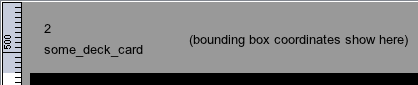
7. Note that the "(enter deck object id)" text on the main window may not change immediately to "2". If it does not change, then changing window focus can cause it to update. An easy way to do this is to focus out, or just click an open area around the main window. The text should be updated.
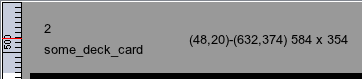
8. Next, you need to set the "Deck Card Name Parameter", but you may not know the name of the "card" animation for the deck in question. If you need to, select the Deck object (called "Some Deck" in this case), and view its list of animations in the Animation pane.
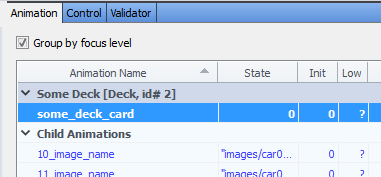
9. Enter the name of the card deck animation ("some_deck_card") into the "Deck Card Name Parameter" custom property of the "Deck Bounding Box Calculator".
10. Once again, if the text at the top of the main window does not update, click to change focus, and it should update.
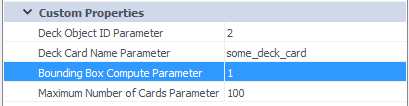
11. Lastly, tell the "calculator" to perform its computations by setting the "Bounding Box Compute Parameter" to 1 (either by entering a 1 directly, or by clicking the up-arrow in the increment/decrement control).
12. Depending on the number cards in the deck, it may take a few moments, but the "Deck Coordinates" text at the top of the main window should be updated. Training mission accomplished!
Using the Deck Bounding Box Calculator in your GUI Model
So how would you apply these concepts to your own design, when you need to compute the bounding box for a card deck within your design? The answer is to merge the "Deck Bounding Box Calculator" group into your design, and then to run it.
1. For this purpose, there is another attachment ("bounding_box_calculator.dsn"). Start by downloading that DSN file, and saving it to a convenient location on your PC.
2. To illustrate using the "calculator" in your own design, we will use a simple design that has an existing card deck with a few basic geometry shapes in it.
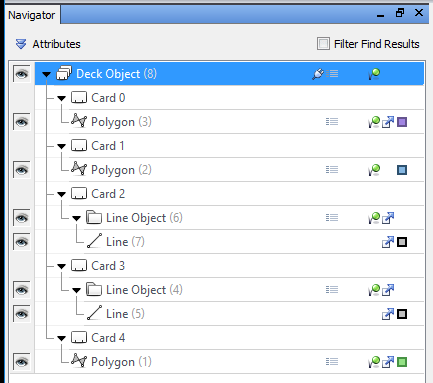
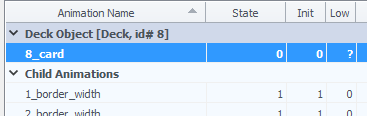
3. Remember that we will need the deck's object ID (in this case, 8), and its card animation name (in this case, "8_card").
4. Activate the "Insert" tab in Altia Design, and locate the "Import DSN" button on the toolbar (the left button shown here).

5. Click the "Import DSN" button, navigate to the "bounding_box_calculator.dsn" file that you downloaded earlier, select that file, and click the "Open" button to merge that DSN into your DSN. You will see that the "calculator" is now part of your design.
6. Set the 3 necessary parameters of the "calculator".

7. And the results show up!

The Mysterious Fourth Parameter
The "Maximum Number of Cards Parameter" is designed to overcome a potential "gotcha".
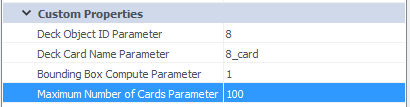
There is no way for the control code attached to the "calculator" to determine the total number of cards in the specified card deck, so by default, it simply loops through cards using card indexes from 0 to 99 (i.e., less than 100). If you have a card deck with more than 100 cards in it, or if any card indexes exceed 99, you will need to modify the fourth parameter to make it something greater than 100.
That parameter is linked to an animation called "dbbc_oi_max_num_cards". In the control code, the loop that tests its value is found here:
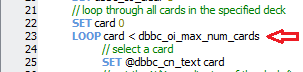
Thus, modifying the "Maximum Number of Cards Parameter" will control the loop limit, as the "calculator" loops through the cards in the deck.
Important: If you do modify the fourth parameter, because your deck has over 100 cards in it, make sure the modify that parameter prior to setting the third parameter ("Bounding Box Compute Parameter") to 1. The third parameter must always be set lastly.